Install Low Power Apache Mynewt and Embedded Rust for STM32 Blue Pill and Visual Studio Code on Windows
Follow these instructions to install Low Power Apache Mynewt + Embedded Rust build and application files for Visual Studio Code on Windows for the article “Low Power NB-IoT on STM32 Blue Pill with Apache Mynewt and Embedded Rust”
Install Rust
1️⃣ Click here to install Build Tools For Visual Studio
2019:https://visualstudio.microsoft.com/downloads/#build-tools-for-visual-studio-2019
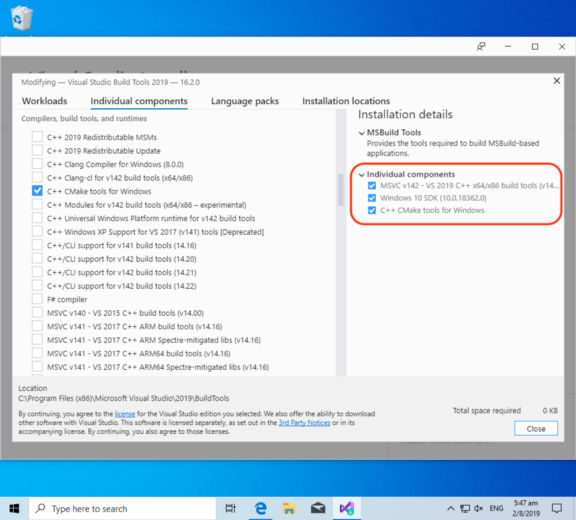
2️⃣ Click the Individual Components tab
Select the following components:
-
Windows 10 SDK (10.0.18362.0) -
C++ CMake Tools for Windows -
(This should be automatically selected)
MSVC v142 — VS 2019 C++ x64/x86 Build Tools
3️⃣ Install rustup according to the
instructions here:https://rustup.rs
Click the link provided to download rustup‑init.exe
Launch the downloaded file rustup‑init.exe
If you see the message “Windows Defender SmartScreen prevented an unrecognised app from starting”…
Click More Info
Click Run Anyway
4️⃣ At the Welcome to Rust! prompt, press
Enter to select the default option:1) Proceed with installation (default)
5️⃣ Open the Windows Command Prompt. Enter into the command prompt:
rustup default nightly
rustup update
rustup target add thumbv7m-none-eabi
rustup target add thumbv7em-none-eabihf
rustc -V
The reported version of rustc should be 1.38.0 or later:
rustc 1.38.0-nightly (435236b88 2019–08–01)
Install Source Files and Build The Firmware
1️⃣ Download the stm32bluepill-mynewt-sensor.7z file attached
below… https://github.com/lupyuen/stm32bluepill-mynewt-sensor/releases/tag/v8.0.0
Expand the .7z file with 7zip…https://www.7-zip.org/download.html
2️⃣ Install Arm Cross-Compiler and Linker for Windows from Arm Developer
Website…https://developer.arm.com/-/media/Files/downloads/gnu-rm/8-2019q3/RC1.1/gcc-arm-none-eabi-8-2019-q3-update-win32-sha1.exe?revision=fcadabed-d946-49dc-8f78-0732d2f43773?product=GNU%20Arm%20Embedded%20Toolchain,32-bit,,Windows,8-2019-q3-update
Select this option at the last install step:"Add path to environment variable"
3️⃣ Download the ST-Link USB driver from ST-Link Driver Website (email
registration required)…https://www.st.com/en/development-tools/stsw-link009.html
Click Get Software
Unzip the
downloaded file. Double-click the driver installer:dpinst_amd64.exe
4️⃣ Install Windows Studio Code:https://code.visualstudio.com/
Launch Visual Studio Code
Install the extension “Cortex-Debug”…https://marketplace.visualstudio.com/items?itemName=marus25.cortex-debug
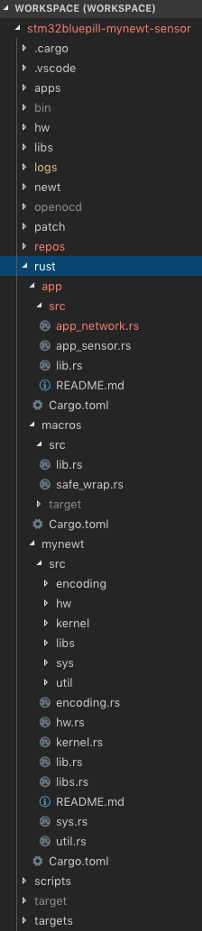
5️⃣ Click File → Open Folder
Select
the downloaded folder stm32bluepill-mynewt-sensor
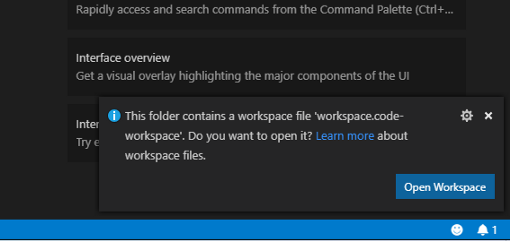
When prompted to open the workspace, click Open Workspace
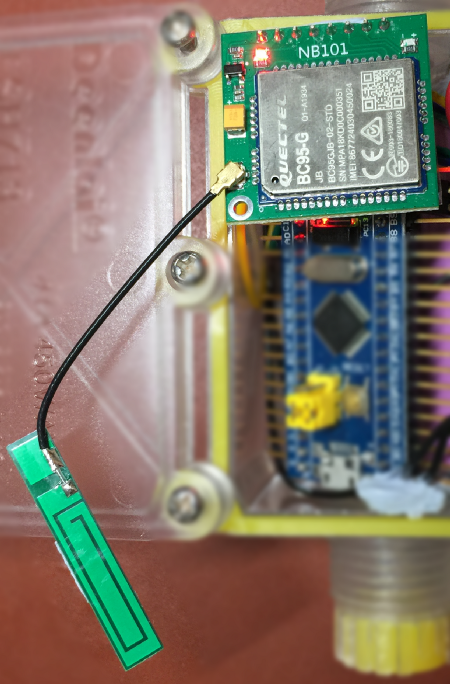
Quectel NB-IoT module
6️⃣ If you have a Quectel NB-IoT module…
Open the following file and configure the program settings:targets/bluepill_my_sensor/syscfg.yml
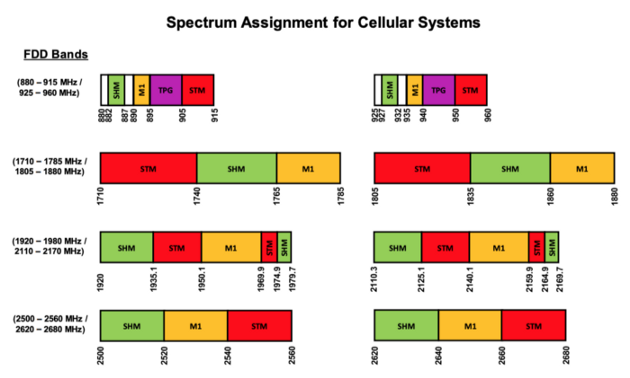
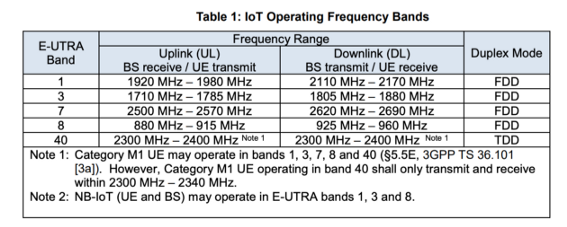
Change the NB-IoT band setting NBIOT_BAND.
Check with your NB-IoT operator for the band to use. The other settings are
documented below.

7️⃣ Click Terminal → Run Task → [1] Build bluepill_boot
This
builds the bootloader, which starts the Apache Mynewt operating system upon
startup. If it shows errors, compare with this build log.
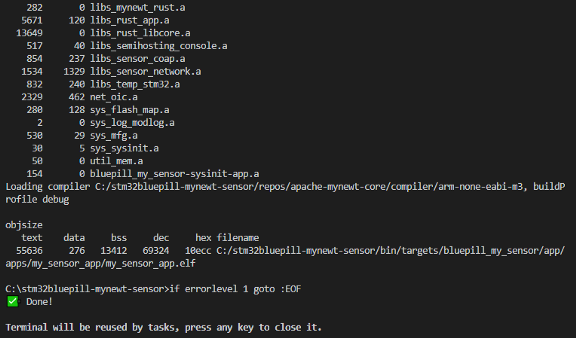
Click Terminal → Run Task → [2] Build bluepill_my_sensor
This
builds the firmware containing our Rust program. Compare with this build log.
When our Rust program has been successfully compiled as Blue Pill ROM firmware, we should see this…
Click Terminal → Run Task → [3] Image bluepill_my_sensor
This
creates the Blue Pill flash image from the firmware. Compare with this image log.
If any source files or configuration files are changed, rebuild the application
by clicking Terminal → Run Task → [2] Build bluepill_my_sensor
Flash The Firmware To Blue Pill
The next step is to flash the firmware into Blue Pill’s ROM. We’ll need to connect the Blue Pill to the USB port of our computer via an ST-Link V2 adapter.

Blue Pill and ST-Link connected to USB port
1️⃣ Check that the Blue Pill is connected to ST-Link…
And the ST-Link is connected to your computer’s USB port.
Now let’s head back to Visual Studio Code…
2️⃣ Click Terminal → Run Task → [4] Load bluepill_boot
This flashes the bootloader to Blue Pill, to start the Apache Mynewt operating system upon startup. If it shows errors, compare with this flash log.
3️⃣ Click Terminal → Run Task → [5] Load bluepill_my_sensor
This flashes the firmware (containing our Visual Program) to Blue Pill. If it shows errors, compare with this flash log.