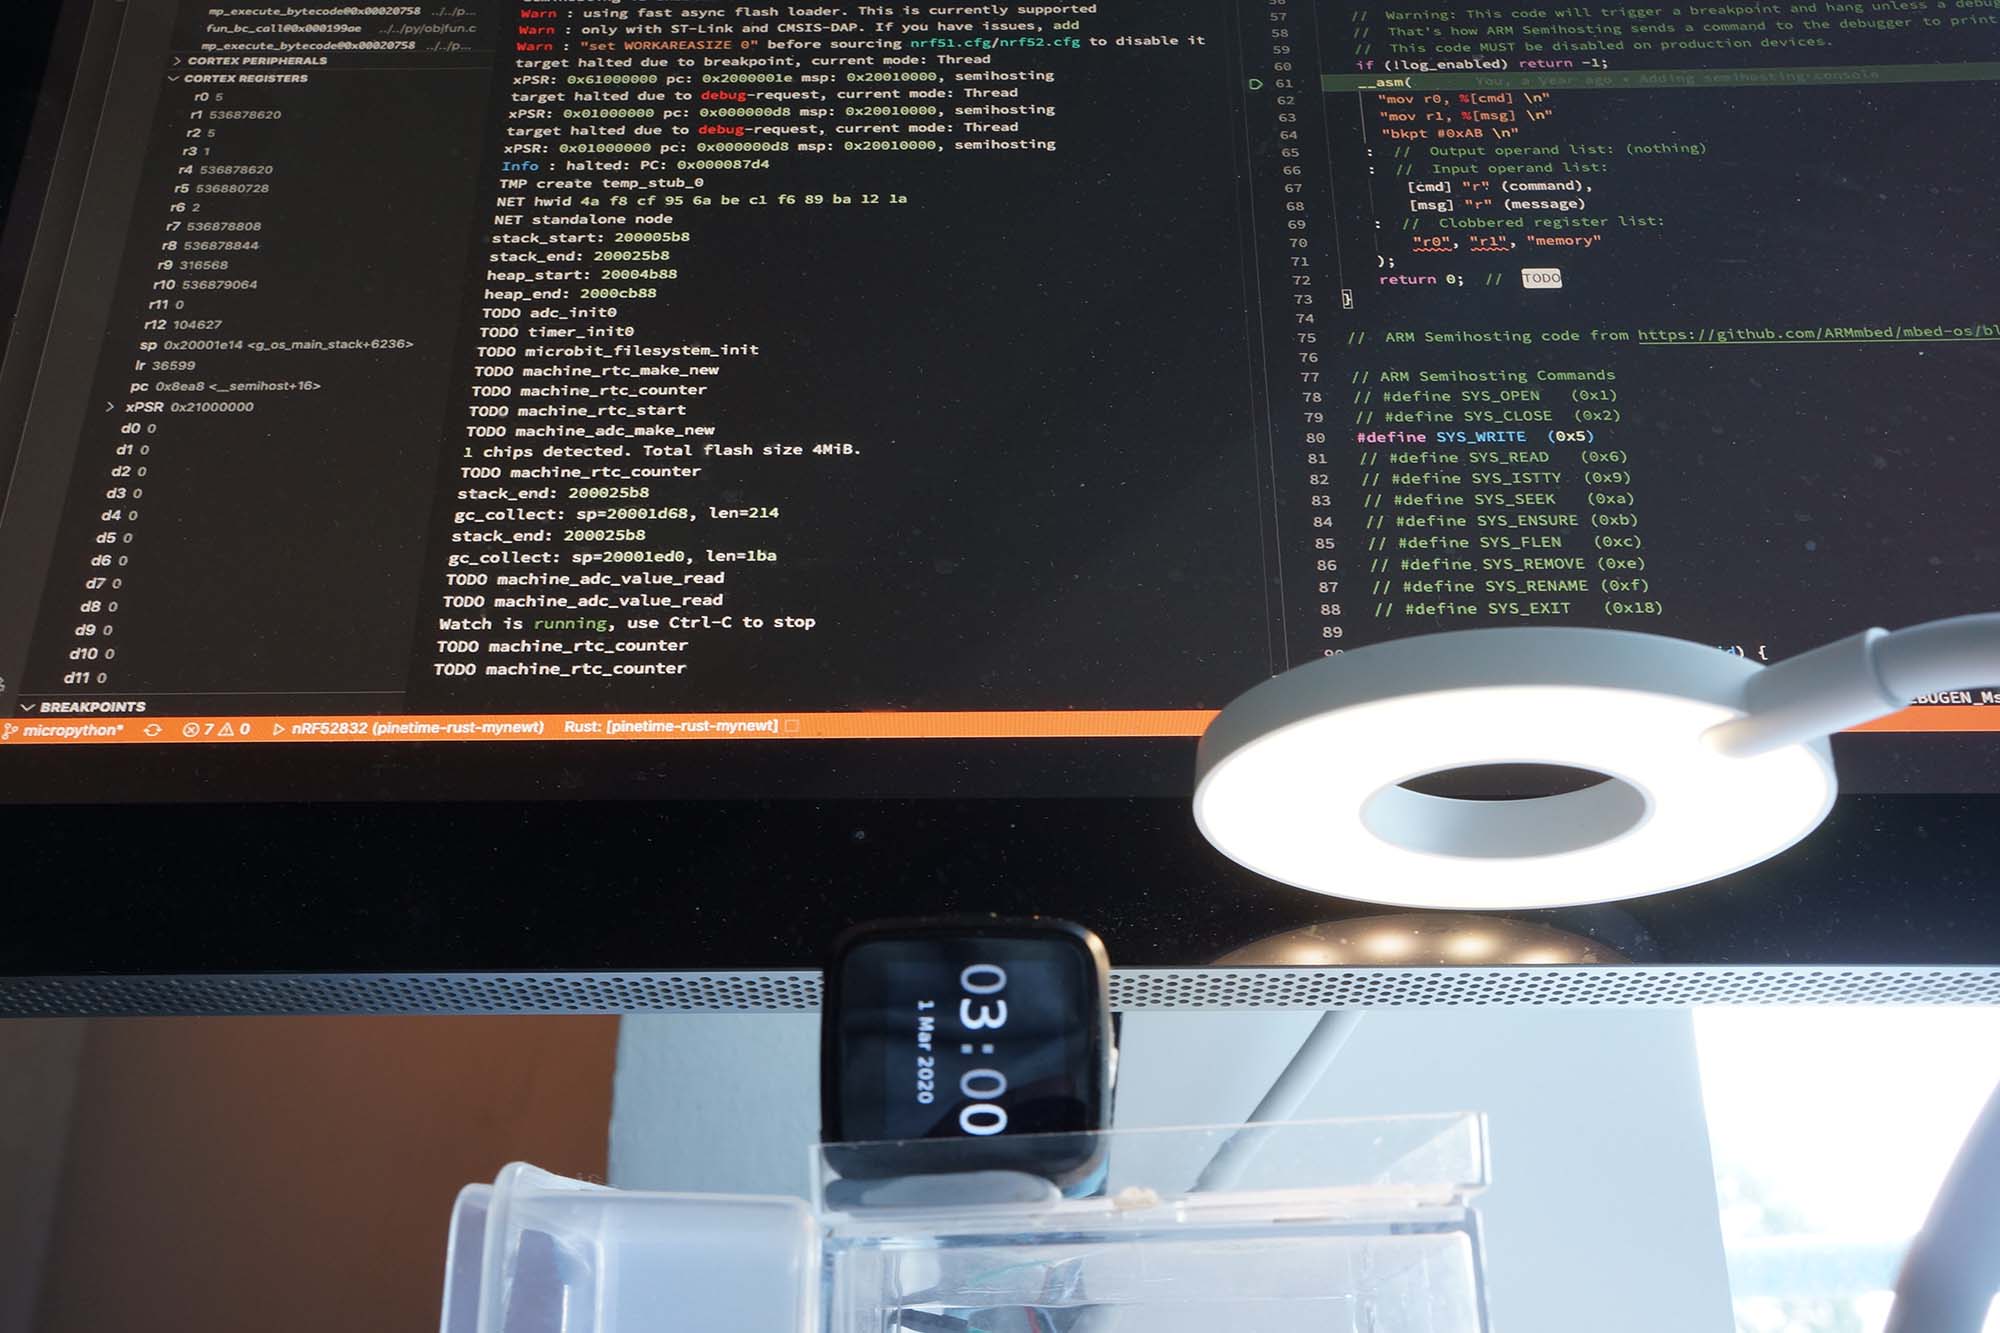
Flutter App with Bluetooth Low Energy running on a real Android phone, connected to VSCode Debugger
📝 4 Jun 2020
Ready to create your very first "Hello World" app with Flutter?
Why not make a sophisticated app that says...
"Hello Bluetooth Low Energy gadgets nearby... Tell me what's inside you!"
With Flutter, Bluetooth LE (Low Energy) apps for Android AND iOS are ridiculously easy to build, let me show you how!
The Flutter SDK works on Windows, macOS and Linux (Intel, not Arm, so Raspberry Pi is no-go).
Unzip the Flutter SDK to our Home Directory.
Add flutter/bin to our PATH.
For macOS and Linux, we may edit ~/.bashrc (or equivalent) and add this...
export PATH="$PATH:$HOME/flutter/bin"
Open a new Command Prompt. Check the Flutter SDK by entering...
flutter
We should see this helpful message...

At the Command Prompt, enter...
flutter doctor
We will see something like this...
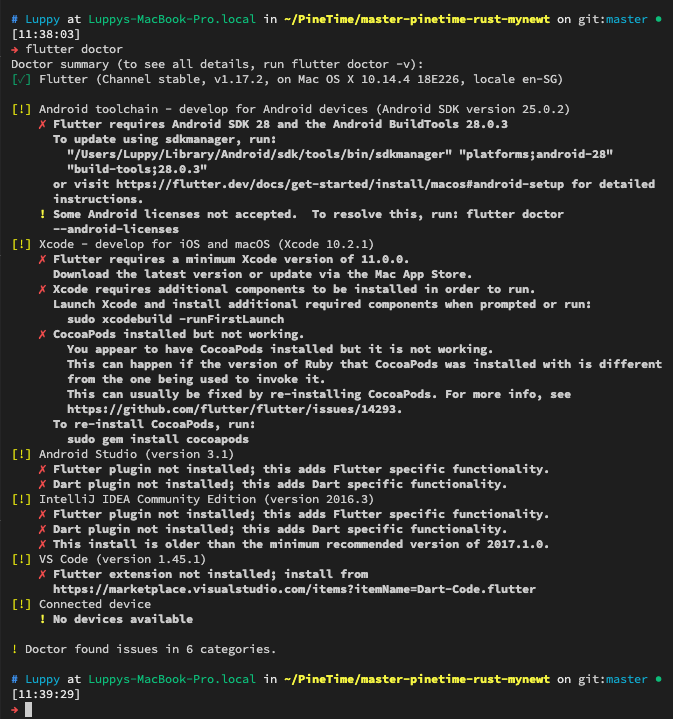
Whoa that's a long list of complaints! But we shall fix only 3 things: Android Toolchain (or Xcode for iOS), VSCode and Connected Device
Let's fix them now...
(If you're building for iPhone, skip to the next section)
Android Toolchain: Follow the instructions shown in your screen.
You may need to run sdkmanager and flutter doctor --android-licenses
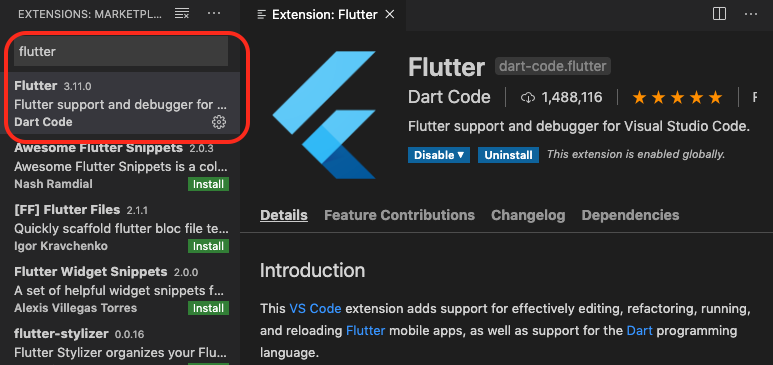
VSCode: Launch VSCode. Click View → Extensions
Install the Flutter Extension for VSCode...
Connected Device: Connect our Android phone (with debugging enabled) to the USB port...
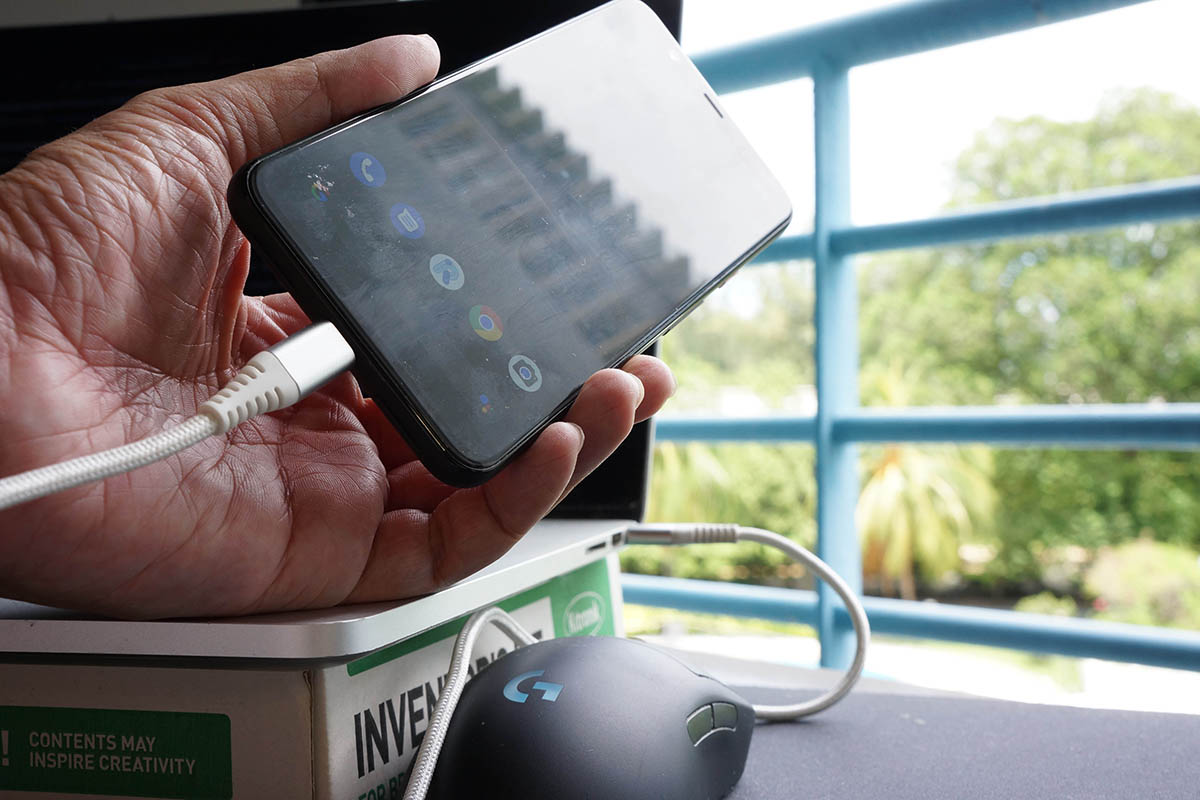
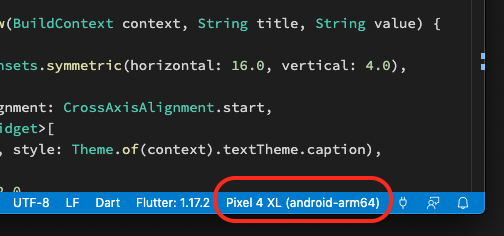
After connecting our Android phone, we should see the phone in the VSCode status bar...
At the Command Prompt, enter...
flutter -v devices
We should see our phone...
List of devices attached
99031FFG device usb:3376X product:coral model:Pixel_4_XL device:coral
Pixel 4 XL • 99031FFG • android-arm64 • Android 10 (API 29)
Finally enter...
flutter doctor
We should see ticks for Flutter, Android Toolchain, VSCode and Connected Device...
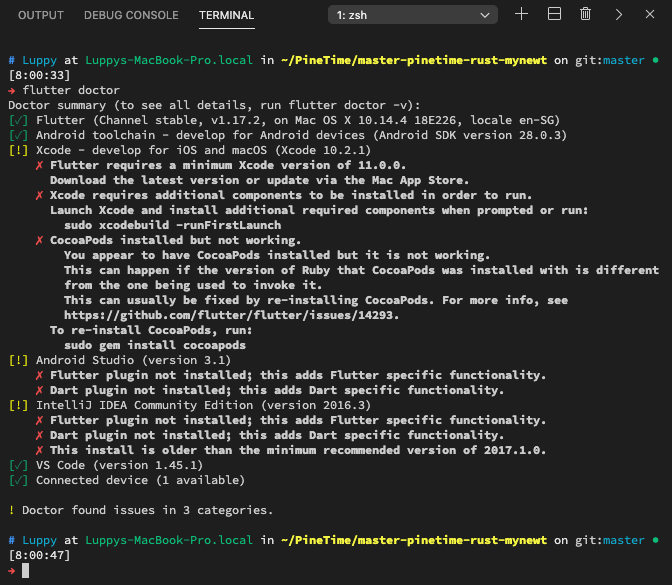
We may ignore the other issues for now
(If you're building for Android, skip to the next section)
Let's fix 3 things shown below: Xcode, VSCode and Connected Device
Xcode: Follow the instructions shown in your screen.
You may need to install Xcode, CocoaPods and run xcodebuild
VSCode: Launch VSCode. Click View → Extensions
Install the Flutter Extension for VSCode...
Connected Device: Connect our iPhone to the USB port.
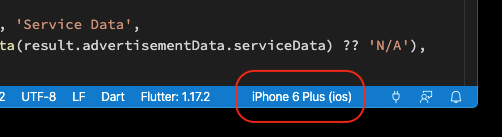
After connecting our iPhone, we should see the phone in the VSCode status bar...
At the Command Prompt, enter...
flutter -v devices
We should see our phone...
1 connected device:
iPhone 6 Plus • ios • iOS 12.4.6
Finally enter...
flutter doctor
We should see ticks for Flutter, Xcode, VSCode and Connected Device...
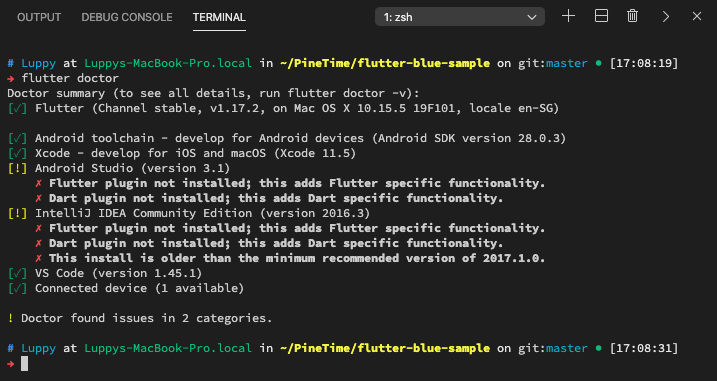
We may ignore the other issues for now
The source code for our Flutter app is located here...
github.com/lupyuen/flutter-blue-sample
Our app is derived from the sample app that comes with the flutter_blue Bluetooth LE plugin for Flutter.
In VSCode, click View → Command Palette
Enter Git Clone
Enter https://github.com/lupyuen/flutter-blue-sample
Select a folder to download the source code
When prompted to open the cloned repository, click Open
When prompted to get missing packages, click Get Packages
Check this video for the steps to download the source code for our Flutter app...
We're now ready to debug our Flutter app on a real Android or iOS phone!
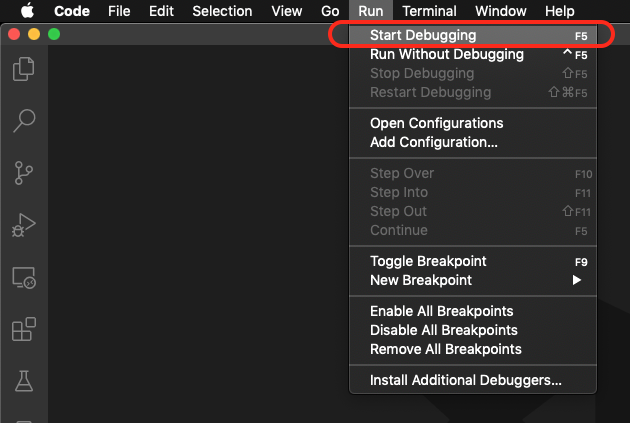
In VSCode, click Run → Start Debugging
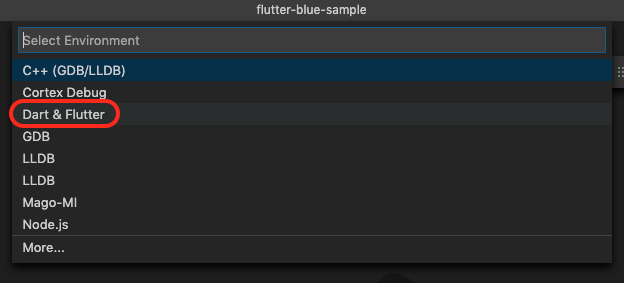
Select the Dart & Flutter debugger
Wait for the Flutter app to be compiled and deployed to our phone (May take a minute for the first time)
For iOS: Check the next section for additional Xcode steps
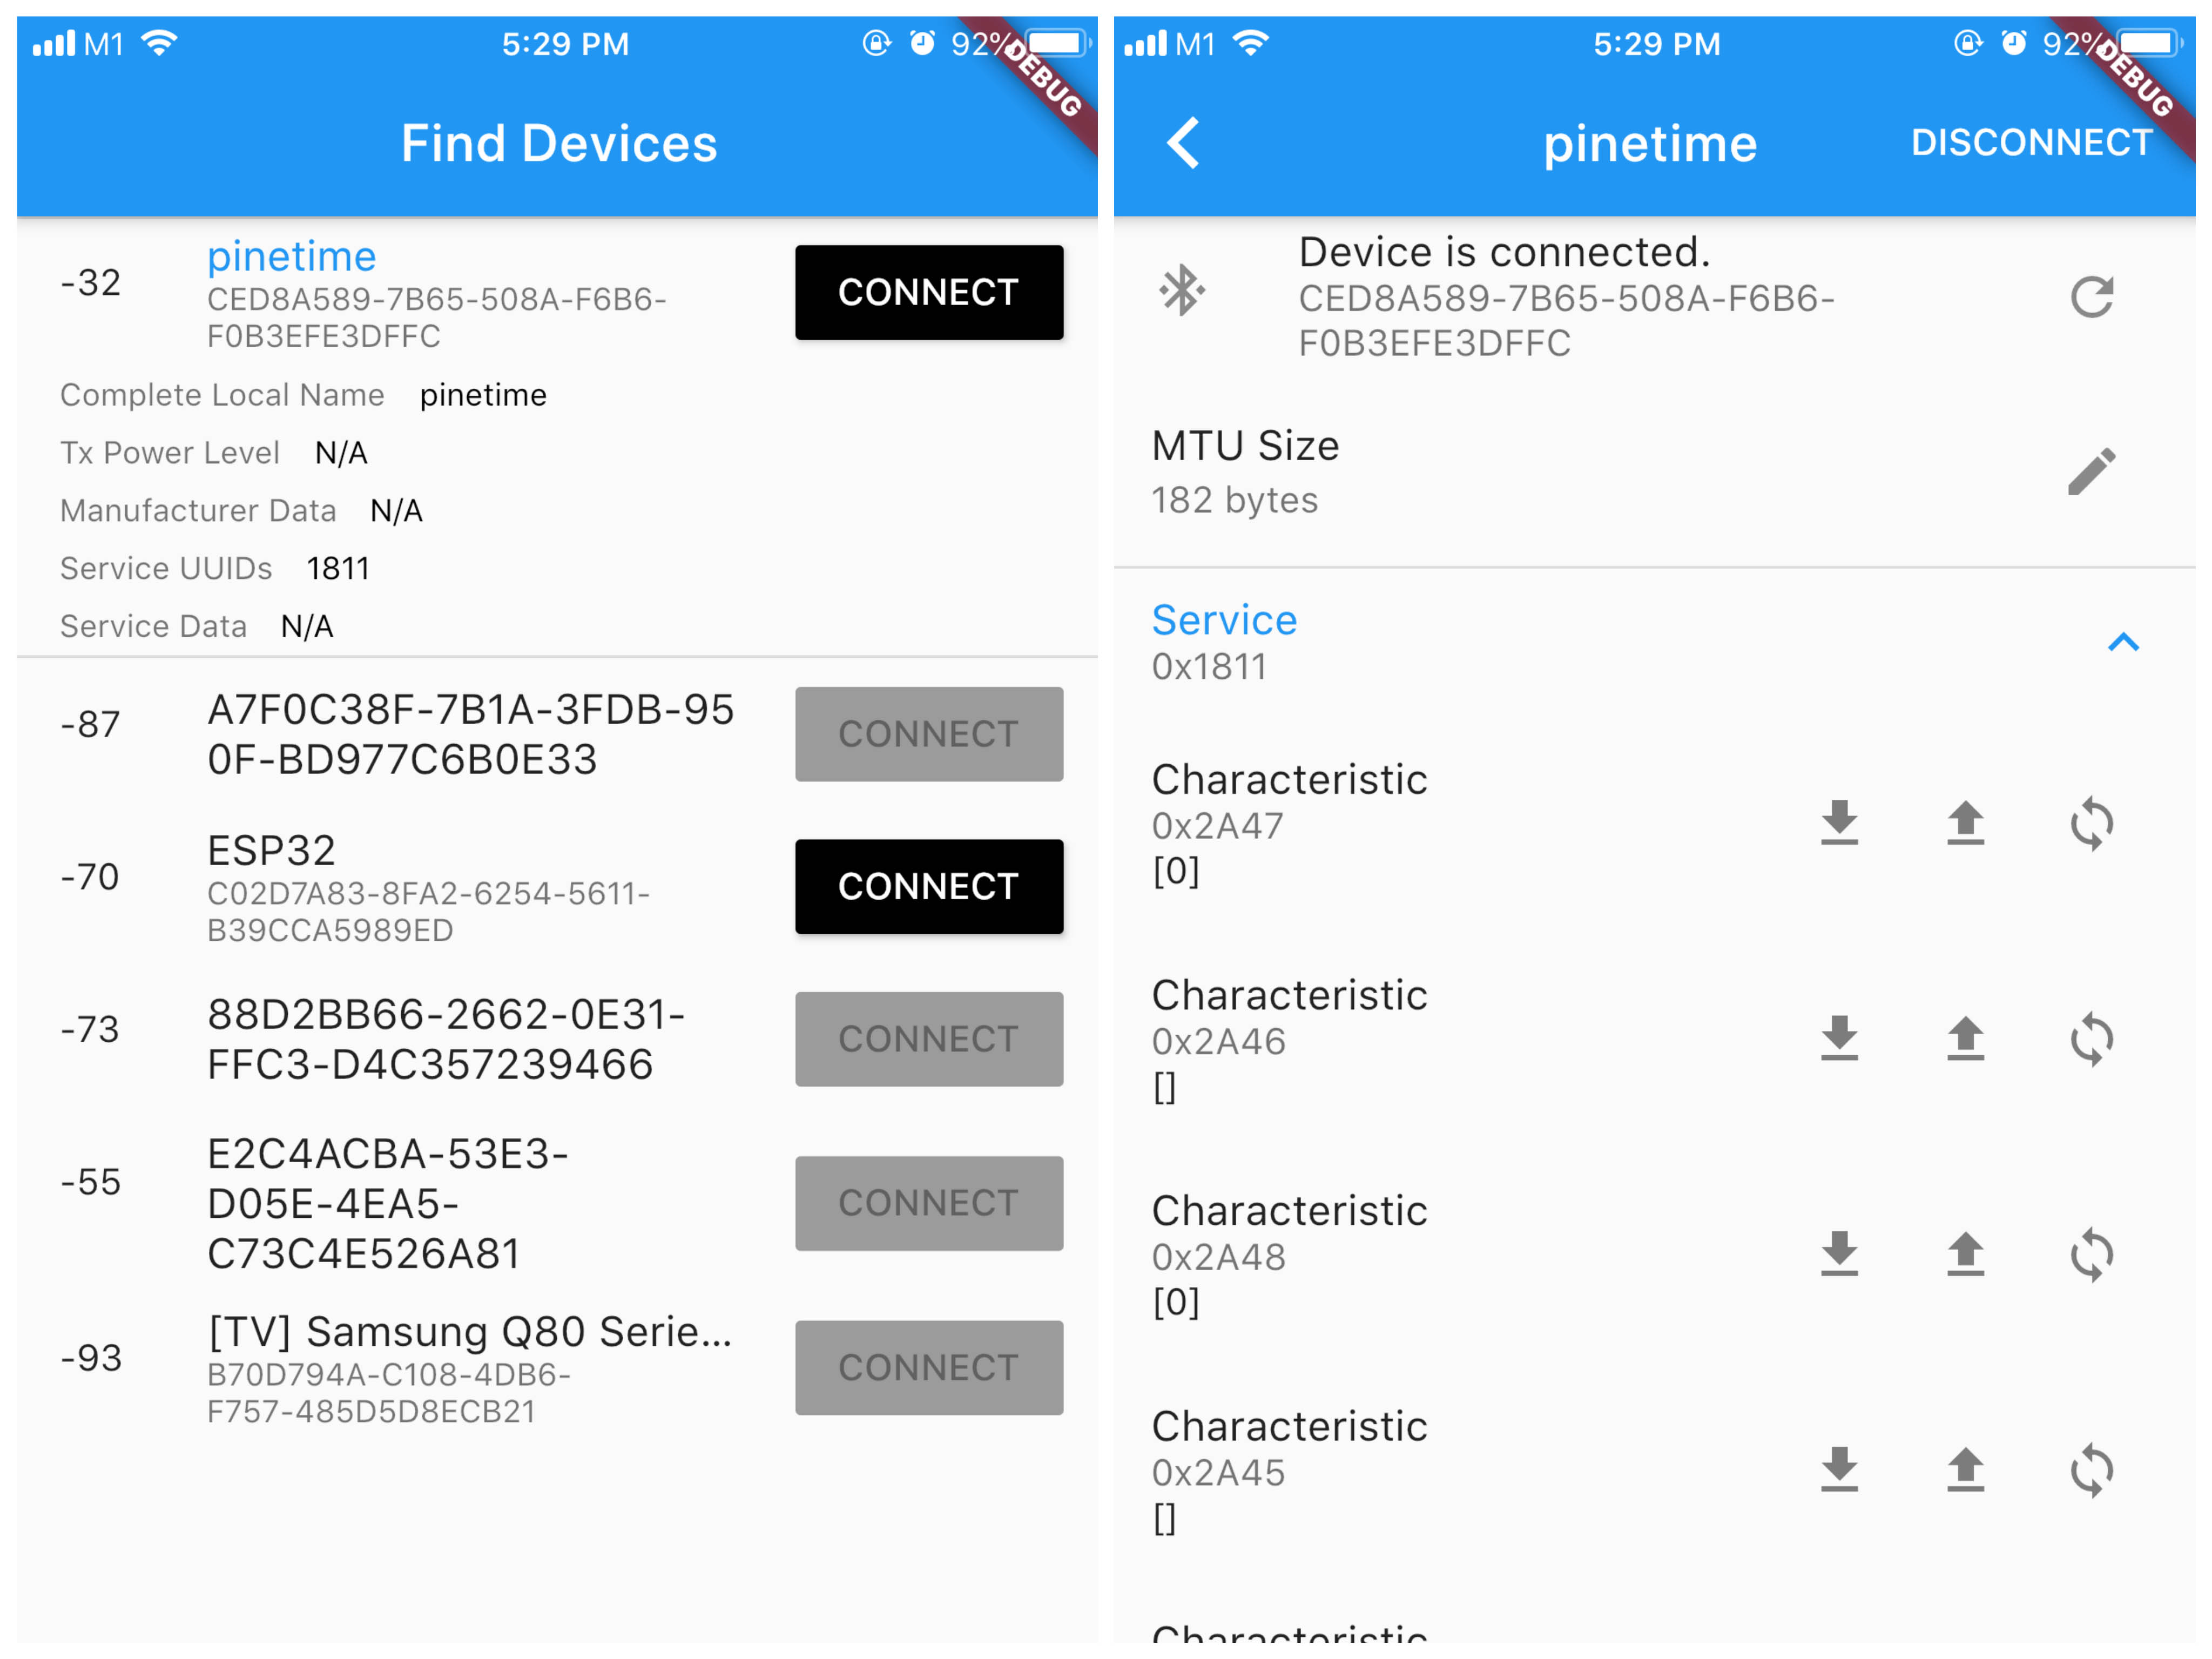
When the Flutter app starts, we'll be able to Scan, Connect, Reload and Expand devices over Bluetooth LE like this...
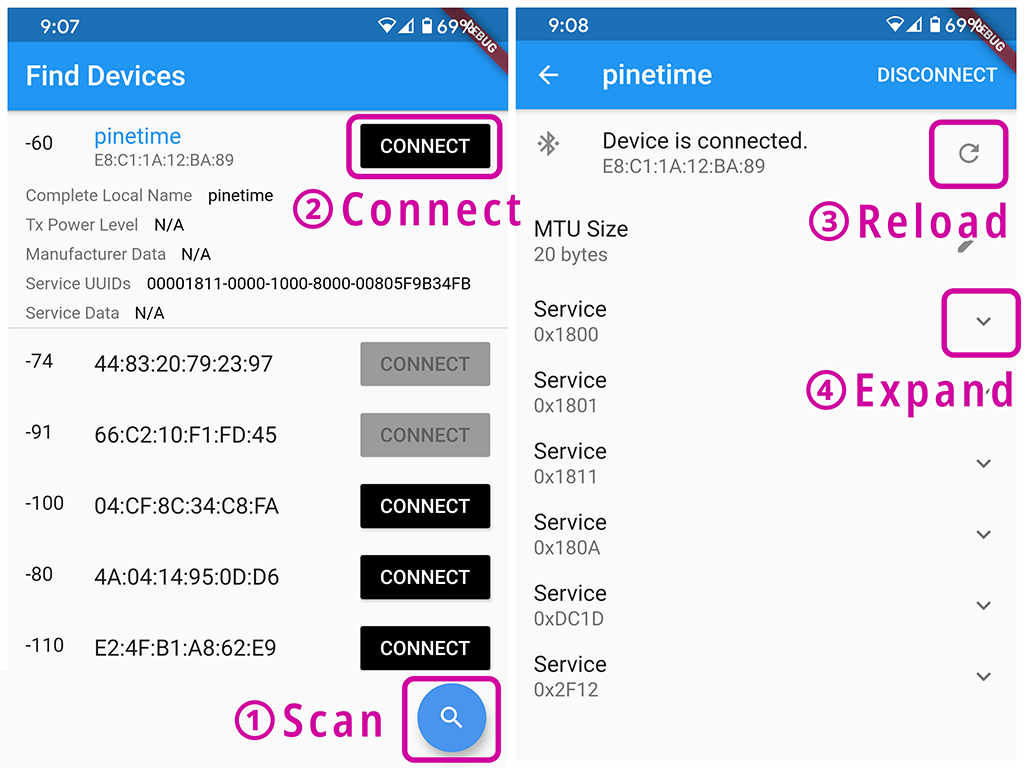
And that's our very first Flutter app with Bluetooth LE!
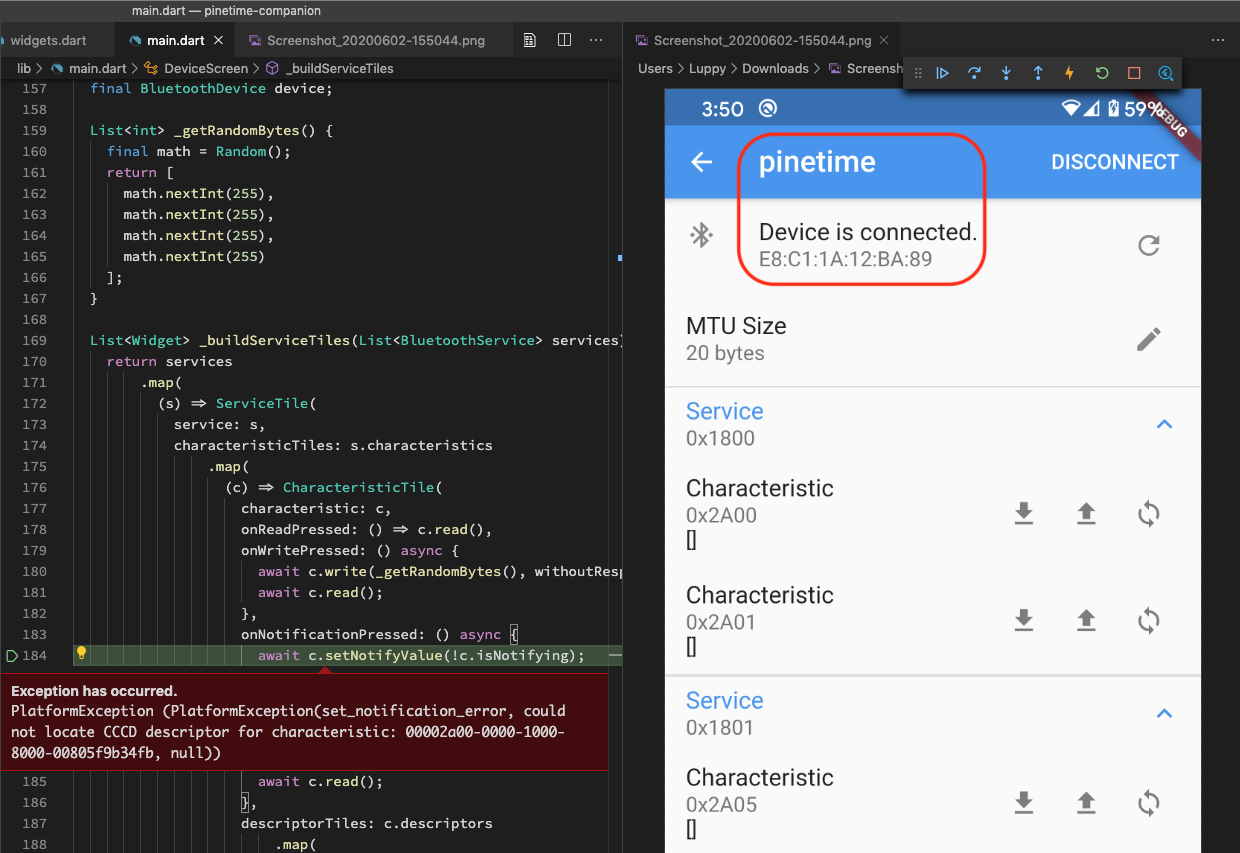
VSCode Debugger has many useful features for debugging Flutter apps. Here's what we see when we hit an unhandled exception in our Flutter app...
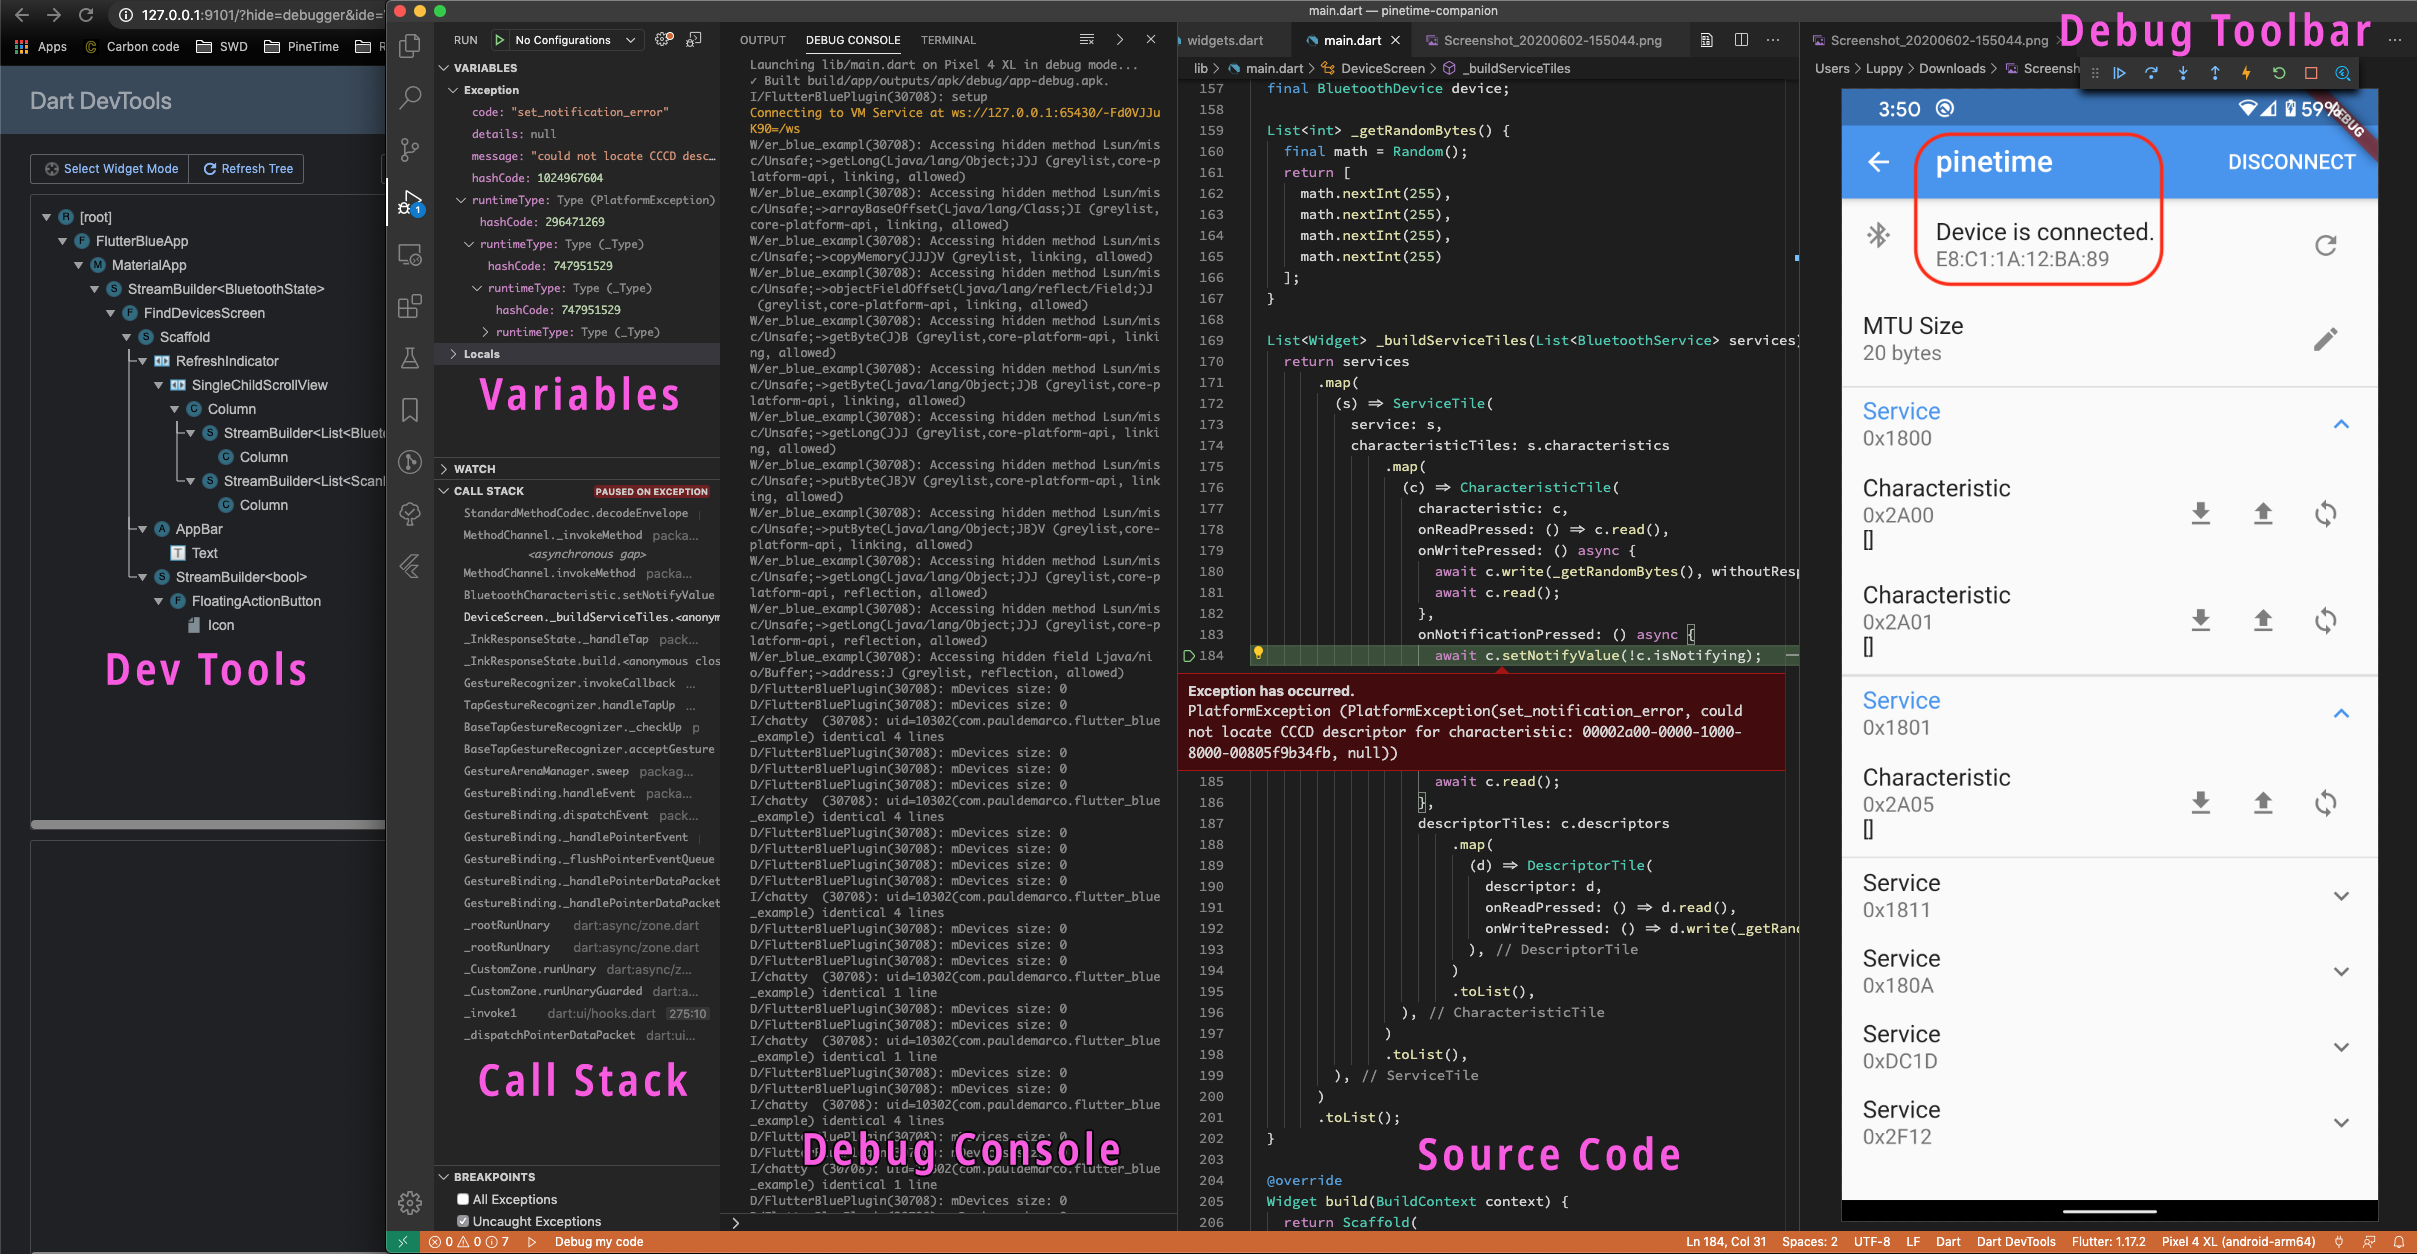
Dev Tools: Shows the widgets rendered in our app
Variables: Shows the local and global variables and their values
Call Stack: Function calls leading to the exception or breakpoint
Debug Console: Compilation, deployment and runtime messages
Source Code: Shows the line of code for the exception or breakpoint
Debug Toolbar: Resume execution, step into functions, step over code, hot reload, restart execution... More about debugging
See this article for more details on building Flutter apps with VSCode, including cool features like Hot Reload...
Here's a video of the steps for debugging a Flutter app with VSCode...
(Skip this section if you're building for Android)
This message appears when we debug our iOS app...
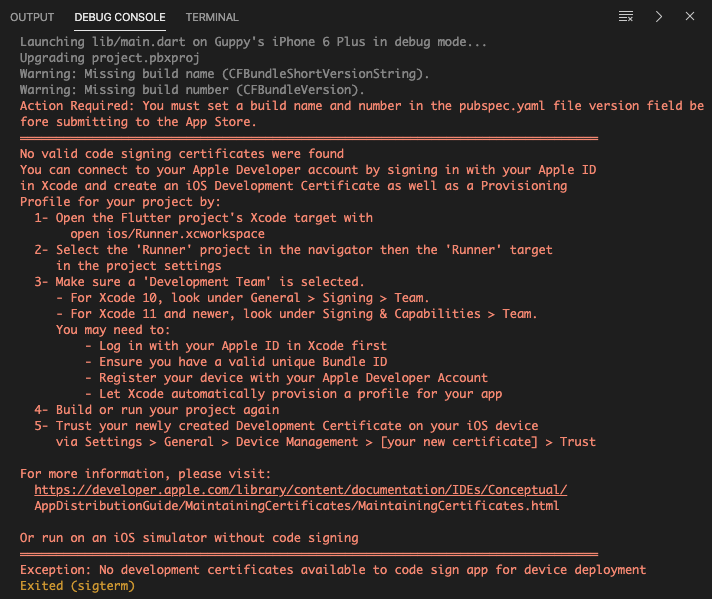
Here's what we need to do for iOS...
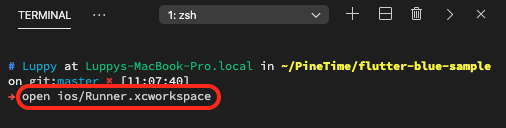
In VSCode, click Terminal → New Terminal
At the Terminal prompt, enter...
open ios/Runner.xcworkspace
In Xcode, click Runner → Targets Runner → Signing & Capabilities
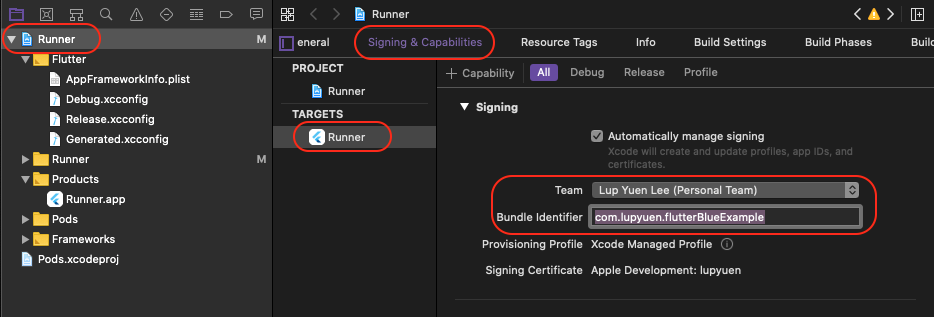
Set Team to our Apple Developer Account
Set Bundle Identifier to a unique name
On our iPhone, click Settings → General → Device Management
Set the Trust Settings like this...

We should be able to launch and debug our Flutter app using the instructions from the previous section...
Here's a demo of our Flutter app on iPhone...
PineTime Smart Watch
Let's connect our Flutter app to a PineTime Smart Watch...
So many Services and Characteristics... What are they?
When we access data and perform functions wirelessly on a Bluetooth LE device (like PineTime), we talk via a Bluetooth LE protocol known as the Generic Attribute (GATT) Profile.
GATT defines the standard way for a Bluetooth LE Client (like our Flutter app) to access a Bluetooth LE Service (like on the PineTime Smart Watch). More about GATT
Our Flutter app displays the GATT Services and GATT Characteristics supported by the Bluetooth LE device. Let's look at the Standard GATT Services that are defined in the Bluetooth LE Specifications...
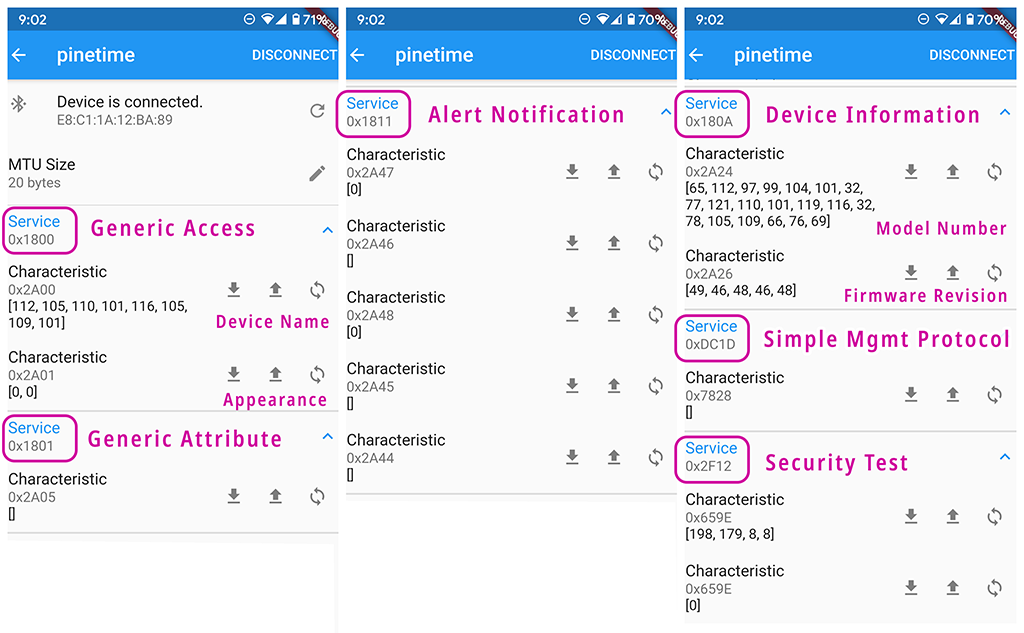
Generic Access (0x1800):
This GATT Service contains two GATT Charactertistics: Device Name (pinetime) and Appearance. Specifications
Generic Attribute (0x1801): This GATT Services notifies our Flutter app of any changes in PineTime's GATT Services.
Specifications
Device Information (0x180A): Contains two GATT Charactertistics: Model Number (Apache Mynewt NimBLE) and Firmware Revision (1.0.0).
Specifications
Alert Notification Service (0x1811): For Alerts and Notifications.
Specifications
Some GATT Characteristics are shown as a list of numbers...
    Device Name:
    Characteristic 0x2A00
    [112, 105, 110, ...]
The numbers are the ASCII codes for the text strings. We can see the actual strings in the Nordic nRF Connect app below.
Can we do complex things with GATT? Like update the firmware wirelessly on PineTime?
There's a custom GATT Service and Characteristic for that!
Simple Management Protocol (8D53DC1D-1DB7-4CD3-868B-8A527460AA84, shortened to 0xDC1D above) is the GATT Service used by PineTime for updating the firmware.
The GATT Service contains a single GATT Characteristic (DA2E7828-FBCE-4E01-AE9E-261174997C48, shortened to 0x7828 above). Our Flutter app may someday update PineTime's firmware by sending a Write Request to this GATT Characteristic (with the firmware file encoded in the request).
More about Wireless Firmware Update on PineTime
The final GATT Service (59462f12-9543-9999-12c8-58b459a2712d, shorted to 0x2F12 above) is the Security Test Service. More details
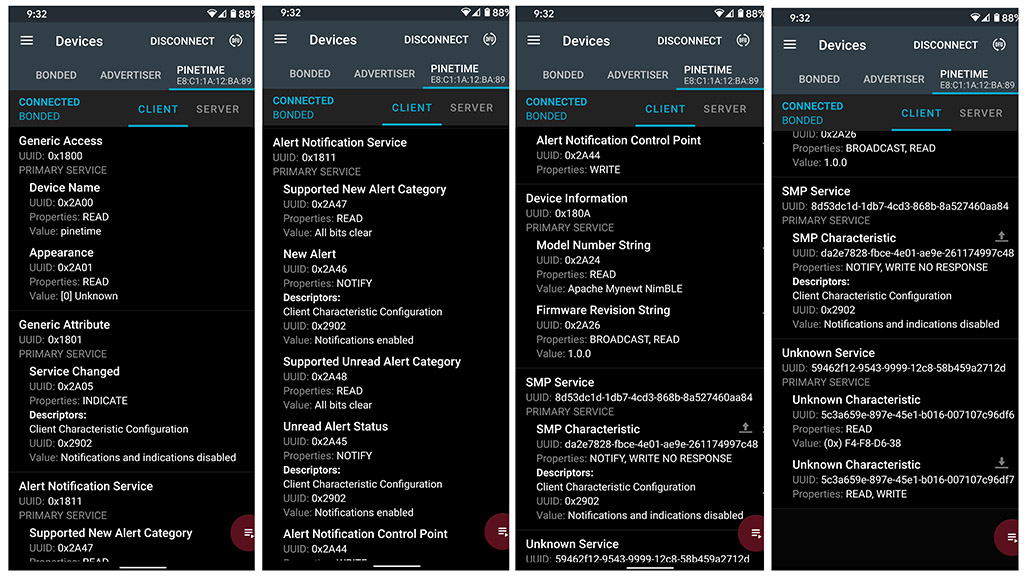
For comparison, here are the GATT Services that appear when the Nordic nRF Connect mobile app is connected to PineTime. So our Flutter app really works!
I'm new to Flutter and Dart... And I find it absolutely amazing that a few lines of code can do so much!
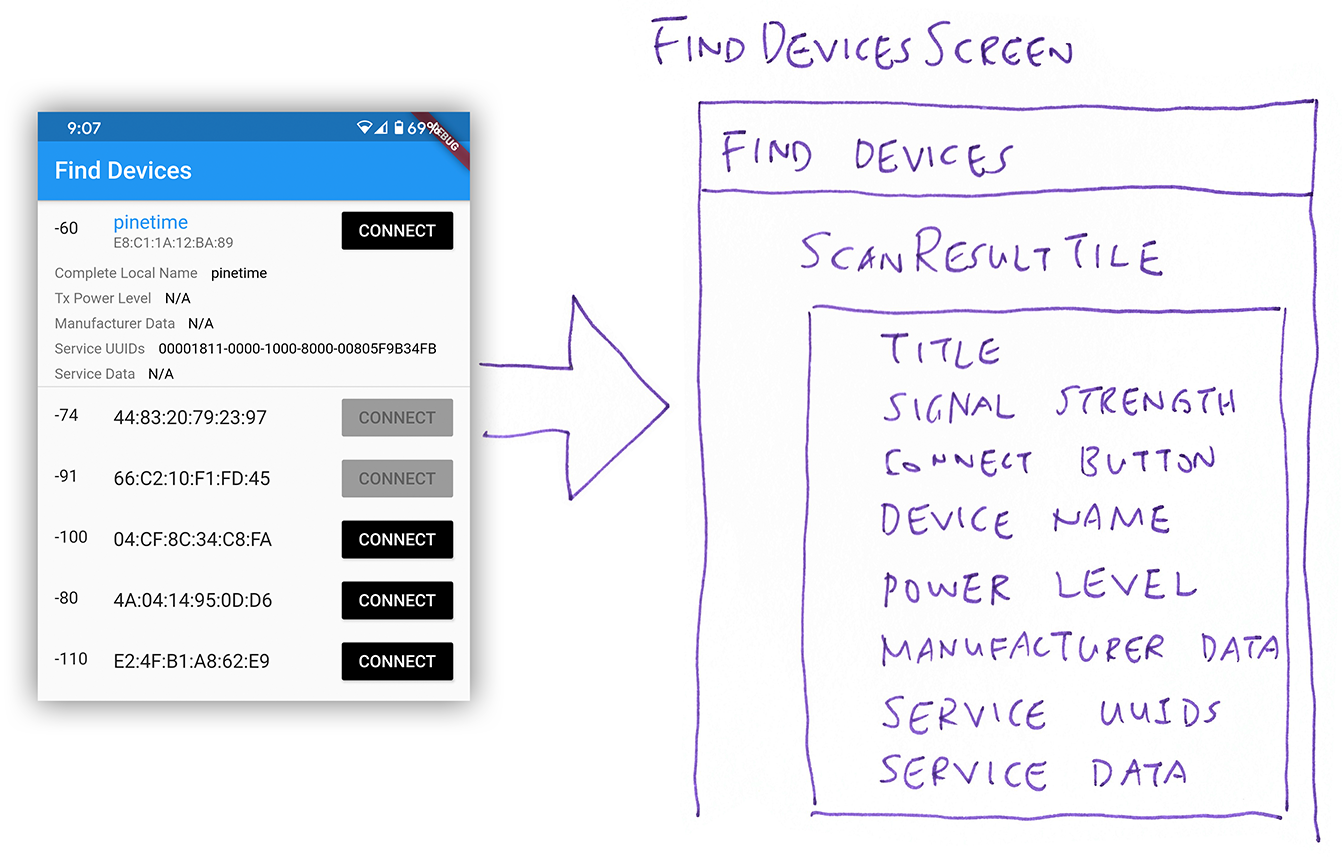
Our app is structured like this to scan Bluetooth LE devices and display them...
Here's the code that implements the screen for scanning Bluetooth LE devices: lib/main.dart
//  Screen for finding devices
class FindDevicesScreen extends StatelessWidget {
  @override
  Widget build(BuildContext context) {
    return Scaffold(
      //  Title for the screen
      appBar: AppBar(
        title: Text('Find Devices'),
      ),

      body: RefreshIndicator(
        //  Start scanning for Bluetooth LE devices
        onRefresh: () =>
            FlutterBlue.instance.startScan(timeout: Duration(seconds: 4)),

        //  List of Bluetooth LE devices
        child: SingleChildScrollView(
          child: Column(
            children: <Widget>[
              ...
              StreamBuilder<List<ScanResult>>(
                stream: FlutterBlue.instance.scanResults,
                initialData: [],

                builder: (c, snapshot) => Column(
                  children: snapshot.data
                      .map(
                        //  For each Bluetooth LE device, show the ScanResultTile widget when tapped
                        (r) => ScanResultTile(
                          result: r,
                          onTap: () => Navigator.of(context)
                              .push(MaterialPageRoute(builder: (context) {
                            r.device.connect();
                            return DeviceScreen(device: r.device);
                          })),
                        ),
                      )
                      .toList(),
                ),
              ),
            ...
And here's the code that renders each Bluetooth LE device found: lib/widgets.dart
//  Widget for displaying a Bluetooth LE device
class ScanResultTile extends StatelessWidget {
  ...
  @override
  Widget build(BuildContext context) {
    return ExpansionTile(
      //  Show the device name and signal strength
      title: _buildTitle(context),
      leading: Text(result.rssi.toString()),

      //  Show the Connect button and call onTap when tapped
      trailing: RaisedButton(
        child: Text('CONNECT'),
        color: Colors.black,
        textColor: Colors.white,
        onPressed: (result.advertisementData.connectable) ? onTap : null,
      ),

      //  Display the device's name, power level, manufacturer data, service UUIDs and service data
      children: <Widget>[
        _buildAdvRow(
            context, 'Complete Local Name', result.advertisementData.localName),
        _buildAdvRow(context, 'Tx Power Level',
            '${result.advertisementData.txPowerLevel ?? 'N/A'}'),
        _buildAdvRow(
            context,
            'Manufacturer Data',
            getNiceManufacturerData(
                result.advertisementData.manufacturerData) ??
                'N/A'),
        _buildAdvRow(
            context,
            'Service UUIDs',
            (result.advertisementData.serviceUuids.isNotEmpty)
                ? result.advertisementData.serviceUuids.join(', ').toUpperCase()
                : 'N/A'),
        _buildAdvRow(context, 'Service Data',
            getNiceServiceData(result.advertisementData.serviceData) ?? 'N/A'),
      ],
    );
  }
  ...
Yes the code looks similar to JavaScript. (Because Dart was designed to compile to JavaScript efficiently)
But overall the user interface code looks Declarative and Functional... A huge improvement over JavaScript and React Native!
How do we call the Bluetooth LE functions in our own Flutter app?
Just add the flutter_blue plugin as a dependency like this: pubspec.yaml
dependencies:
  flutter_blue: ^0.7.2
I'll be using the code in this article to create the open source PineTime Companion App for Android and iOS. So that we can flash our PineTime Smart Watches wirelessly, sync the date and time, show notifications, chart our heart rate, ...
Flutter makes it really easy to maintain a single code base for Android and iOS... And flutter_blue makes Bluetooth LE coding so simple!
If you're keen to help out, come chat with the PineTime FOSS Community (and me) in the PineTime Chatroom!
PineTime Chatroom on Matrix / Discord / Telegram / IRC
Got a question, comment or suggestion? Create an Issue or submit a Pull Request here...
pinetime-rust-mynewt/rust/ app/src/flutter.md
"MCUBoot Bootloader for PineTime Smart Watch (nRF52)"
"Firmware Update over Bluetooth Low Energy on PineTime Smart Watch"
"Wireless Firmware Update In Action on PineTime Smart Watch (nRF52)"